Teach You How to Install Rubber Joints
Effective operation of non-metallic rubber joints depends on proper installation and a well-designed piping system. This article provides guidelines for installation and maintenance to ensure that install rubber joints meet or exceed system requirements.
Tools/Materials
- Pipe Rubber Joints
- Calibrated torque wrench; • Tape measure; • Lubricant for elastomeric flanges; • Appropriate safety equipment; • Other factory specified equipment
Required Tools
Special tools are required to install rubber joints, always use standard safety equipment, and follow good safety practices. Purchase the following equipment prior to installation: • Calibrated torque wrench; • Tape measure; • Lubricant for elastomeric flanges; • Proper safety equipment; • Other factory-specified equipment Bolt Discount Code
Check And Clean
Verify system operating requirements: pressure; temperature, vibration; check supports and alignment guides to ensure they meet system requirements; check rubber joints including external, internal, and flange face cuts and chisels; check pipe flange face roughness and damage; remove all foreign objects and debris; replace any parts found to be defective
Alignment Flange
Orient the pipe flange faces to ensure shaft alignment is within 1/8″ without using excessive force. It may be necessary to use offset fittings when the pipe is not properly aligned.
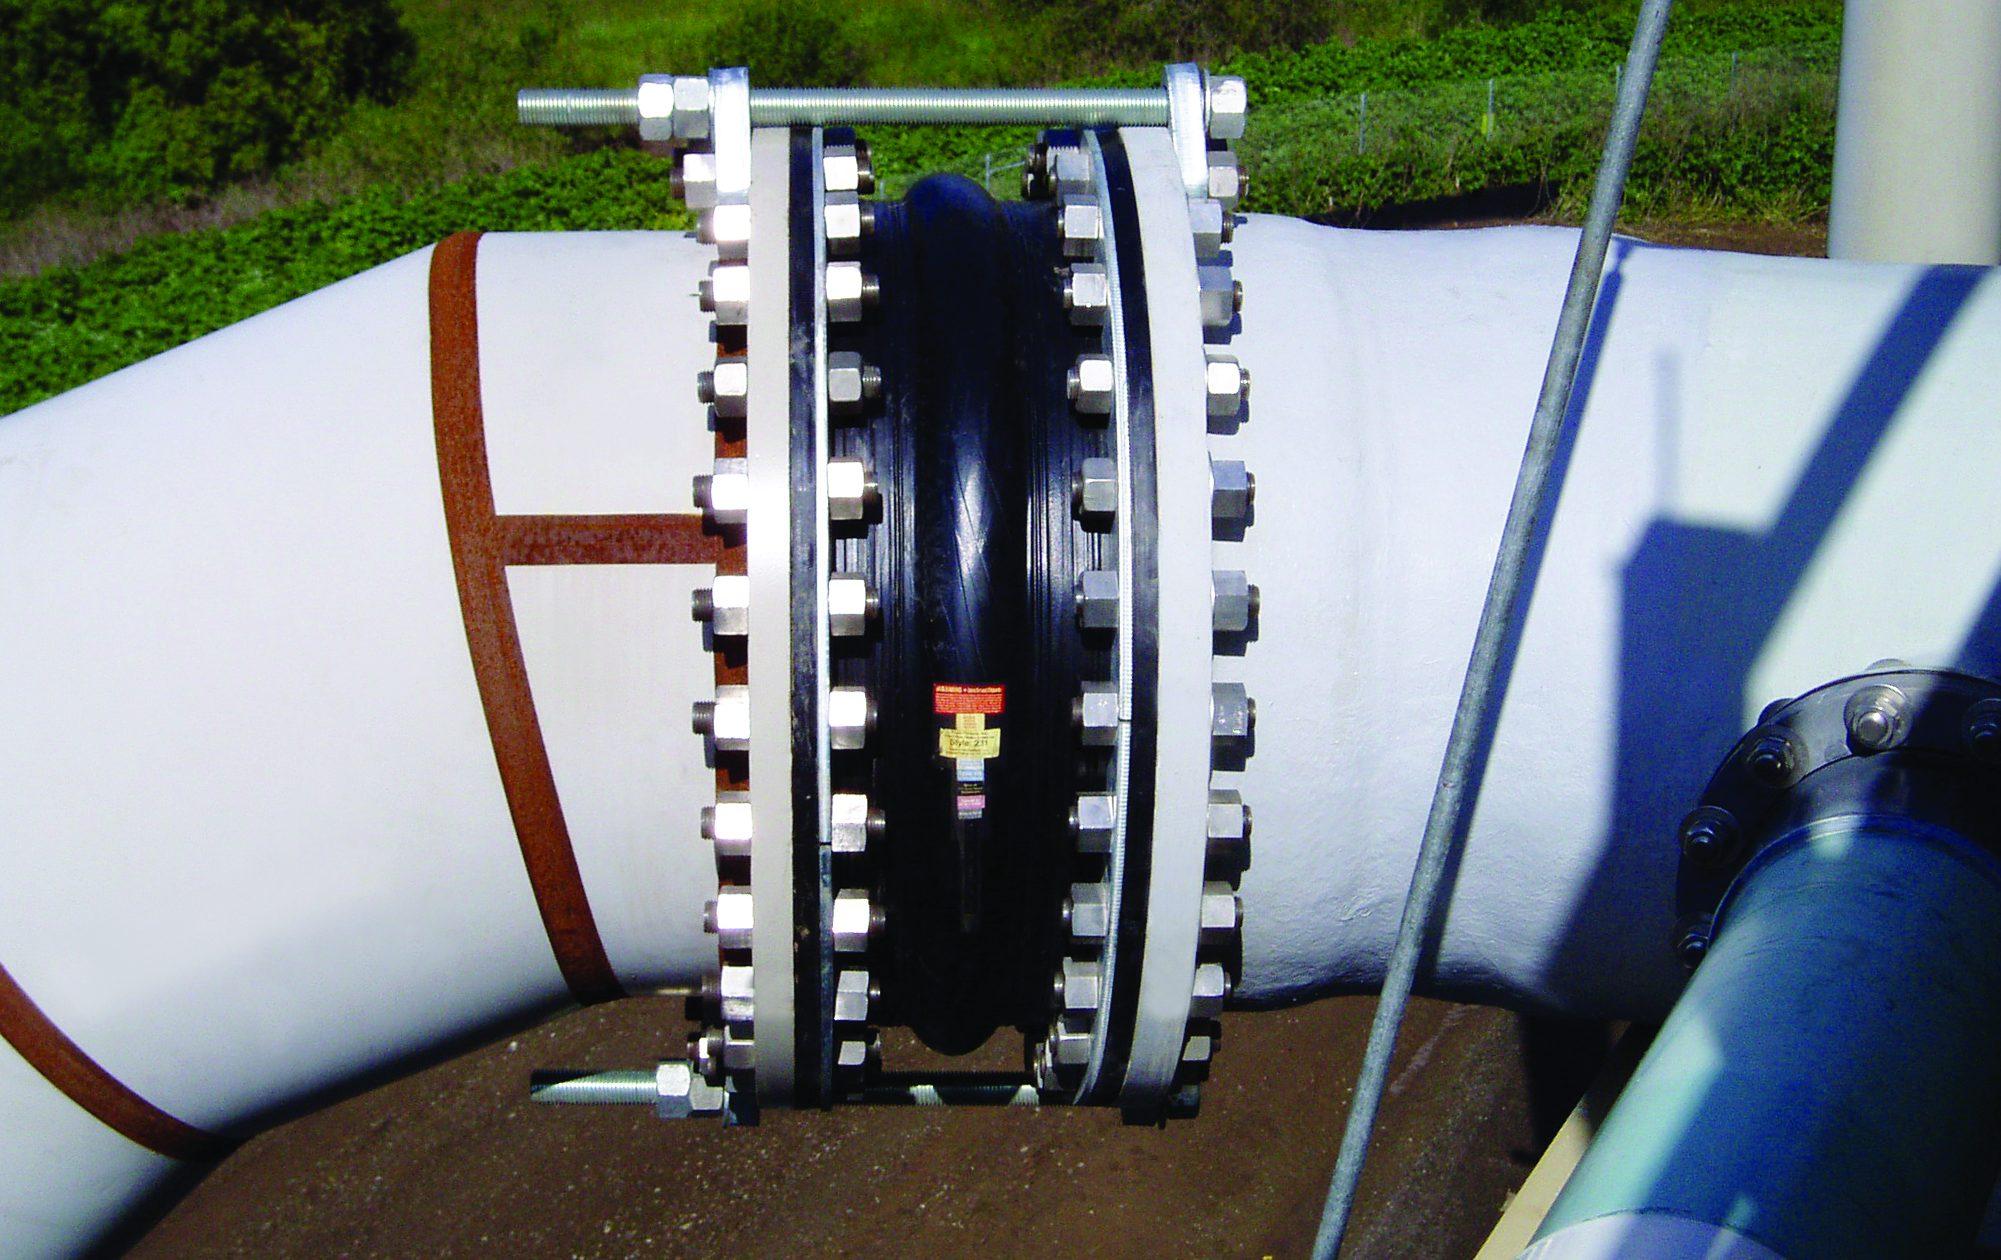
Install Rubber Joints
Ensure rubber joints are functional for the specified size, material and application. If necessary, apply a thin coat of a non-petroleum-based lubricant, such as soapy water, to the flanges.
Carefully install the rubber joint to make sure there is no damage and line up the bolt holes. Support the rubber joint until the bolts are in place. Gasket pipe flanges with raised faces may be required.
Install And Tighten Bolts
Insert the rubber joint with the bolt with the washer through the retaining ring on the arched side, then through the mating flange pattern in a cross pattern. (Fully threaded can use nuts on each end if there is not enough room for bolts.
All threads passing through arched nuts should be kept to a minimum.) STEP 2 – Attach and tighten nuts (with washers) until the hand is tight. Step 3 – Torque each bolt to full torque in a cross-bolt pattern until the outer edge of the expansion joint flange is raised.
Install gussets on the outside of the mating flange when a control unit is required. Insert the rod through the hole in the hole in the outer plate.
Precautions
- The number and distribution of control rods must meet the minimum values approved by the manufacturer or specified by the design. If not otherwise specified, the minimum limits of the FSA Technical Manual shall apply.
- If required, install the compression sleeve when the lever is inserted into the gusset. Place nuts and metal and/or elastomeric washers on control rods.
- Tighten to the point where metal-to-metal contact is made between mating flanges; overtightening can cause deformation of the rubber joint sealing bead and premature failure; periodically re-torque bolts after system startup.
- Inspect rubber joints periodically to verify satisfactory fit and operation and remove any debris from their surroundings. Retighten the bolts periodically. Apply factory-approved maintenance procedures as needed. When welding near rubber joints, cover with a blanket or other protective device to prevent damage.
- Storage: Rubber joints should be stored in a relatively dry, dark, cool warehouse location. Storage near ozone production equipment should be avoided. Evenly support the flange side down on a pallet or wooden platform. Do not place other heavy objects on top of the rubber joint. Just choose Best Products the one that suits you.
Related Experience
- How to remove the black scale inside the iron pot
- How to Clean the Bottom of a Pot
- How to deal with the charred bottom of the pot (sticky bottom, sticky bottom)
- How to get rid of the black on the iron pan burnt
- Lamb Tripe and Lotus Root Soup
How Solidworks calls nuts
Nuts can be seen everywhere in our lives. In Solidworks, we can call them directly, saving the need to draw them by hand. So how to call them
Method/Step
- The method of calling Nut is very simple. There are two common ways. Our software generally installs plug-ins. After opening the software, click Tools.
- Then find the plug-in in the tool, and select the standard parts library in it.
- Open the standard parts library, and then the second option is the nut.
- After clicking on the nut, there are many types of nuts inside.
- After selecting one of the general types, you can also find specific types.
- Select the specification on the right, and then double-click to generate the nut.
- Another method is the parts that come with the software, click Toolbox on the right side of the software. Then find the national standard in it, which is the GB of the Chinese logo.
- Then find the nut inside, and after opening the nut, you can also find many types.
- Then right-click and click Generate Part, and then the nut can be generated, and the specifications can be adjusted after generation.
How to draw a nut in Solidworks
When using Solidworks, some screws, nuts and other parts are often used, so how to draw the nuts Amazon Discount Code NHS
Detail
- The nut is a standard part. We don’t need to draw it in Solidworks, we can call it directly. After we open the software, click the design library on the right.
- Then select the Toolbox option.
- Next, directly select Insert Now to import standard parts such as screws and nuts.
- Then we choose the national standard library, which is the option of GB.
- Then find the nut folder.
- Next we can see many types of nuts, choose a model you want to use.
- Then right click and select Make Part.
- Then select the size of the part and other values.
- In fact, in addition to calling from the parts library in Solidworks, we can also call screws and nuts in some plug-ins.
Rubber Joints: What is Rubber Aging
During the sale, storage or use of rubber or rubber joints, due to the influence of heat, oxygen, light, mechanical force and other factors, physical and chemical changes occur, performance decline or even loss of use is called rubber ageing.

